Why Is My AC Running But Not Cooling the House? 10 Common Culprits
There is nothing quite as frustrating as coming home on a scorching summer afternoon, hearing the reassuring hum of your air conditioner, and realizing the air coming out of your vents is lukewarm at best. You check the thermostat, confirm it is set to “cool,” and listen to the outdoor unit buzzing away. Yet, the indoor temperature continues to climb. When your AC is running but not cooling the house, it creates a stressful situation that leaves you sweating and wondering what went wrong.
Understanding the root cause of this common household dilemma is the first step toward restoring comfort to your living space. While some air conditioning issues require specialized knowledge and heavy-duty diagnostic tools, several frequent culprits can be identified—and sometimes even fixed—by a homeowner. This comprehensive guide will walk you through the 10 most common reasons your cooling system is failing to lower the temperature, offering detailed insights and actionable solutions to get your home feeling crisp and comfortable once again.
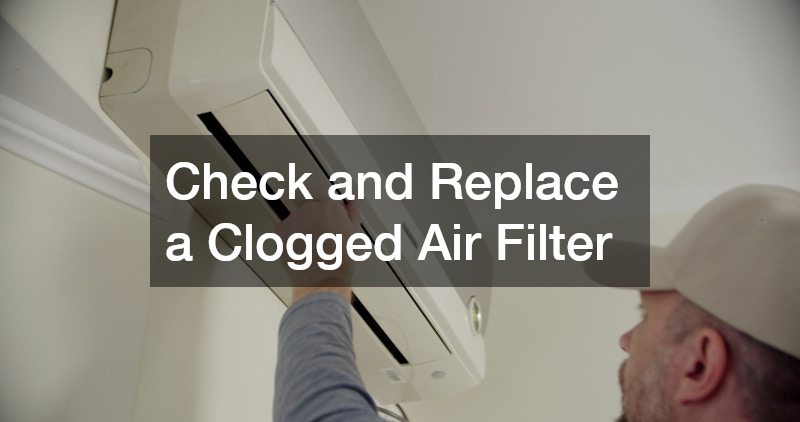
1. Check and Replace a Clogged Air Filter
The air filter is the unsung hero of your central cooling system, responsible for trapping dust, pet dander, and airborne debris before they enter your equipment. When a filter becomes excessively dirty or clogged, it restricts the volume of air flowing through the system, forcing the fan motor to work significantly harder while failing to push enough conditioned air into your living spaces. This lack of airflow can cause the internal temperatures of the system to drop drastically, ironically leading to a system freeze-up that halts the cooling process entirely.
To resolve and prevent this issue, you should check your air filter at least once a month during the peak cooling season. Slide the filter out of its slot and hold it up to a light source; if you cannot see light passing through the mesh, it is time for a replacement. Standard fiberglass filters generally need to be replaced every 30 days, while higher-efficiency pleated filters can last anywhere from 60 to 90 days. Taking this simple, inexpensive step ensures your system maintains the robust airflow necessary to drop your indoor temperatures effectively.
2. Clear Debris and Vegetation Around the Outdoor Condenser
Your outdoor condenser unit relies on a constant, unobstructed stream of ambient air to dissipate the heat it has gathered from inside your home. Over time, autumn leaves, windblown grass clippings, twigs, and encroaching garden foliage can surround the unit, choking off its breath and trapping heat inside the system. When the condenser cannot release heat effectively, the entire cooling cycle breaks down, leaving your indoor blower to circulate warm, unconditioned air throughout your rooms.
Maintaining a clean zone around your outdoor equipment is a straightforward DIY task that can yield immediate improvements in cooling efficiency. Power down the system at the outdoor disconnect box and use a garden hose to gently wash away accumulated dirt and pollen from the metal fins, taking care not to use a high-pressure pressure washer that could bend the delicate aluminum.
- Prune back bushes: Keep all shrubs, weeds, and tree branches trimmed at least two feet away from all sides of the unit.
- Clear the top clearance: Ensure there are no low-hanging branches or deck structures within five feet above the top of the condenser.
- Remove ground debris: Regularly rake away fallen leaves, mulch, and twigs that accumulate at the base of the equipment.
Once the perimeter is entirely clear, restore power to the unit and monitor the indoor air temperature to see if normal cooling performance resumes. For deeper internal cleaning of the coil structures, scheduling annual preventative maintenance with local HVAC companies is the best way to keep the system running efficiently. Entrusting this seasonal upkeep to a reputable HVAC contractor ensures that hidden debris deep within the fan assembly is safely removed before the summer heat hits its peak.
3. Inspect and Reset Your Thermostat Configurations
Sometimes, the issue isn’t a mechanical failure within your cooling equipment, but rather a miscommunication originating from the control center of your home. Thermostats can easily be bumped, incorrectly programmed, or reset to default factory settings following a brief power flicker or a dead battery event. If your thermostat fan setting is accidentally switched from “Auto” to “On,” the indoor blower motor will run continuously 24/7, even when the outdoor compressor is resting, resulting in periods where lukewarm air blows directly out of your supply registers.
Begin your troubleshooting by verifying that the system mode is explicitly set to “Cool” and that the target temperature is set at least five degrees below the current room temperature. If the display screen is blank or flashing a low-battery icon, replace the batteries immediately, as weak batteries can prevent the thermostat from sending the necessary electrical signal to engage the outdoor compressor.
If you own a newer smart or programmable thermostat, log into the accompanying mobile application to verify that an automated energy-saving schedule isn’t overriding your manual comfort settings. When a thermostat continues to misbehave or fails to trigger the outdoor unit after these adjustments, reaching out to a certified HVAC technician can help determine if the device needs calibration or complete replacement. Seeking assistance from established HVAC services will ensure your control wiring is properly mapped and compatible with your specific cooling system model.
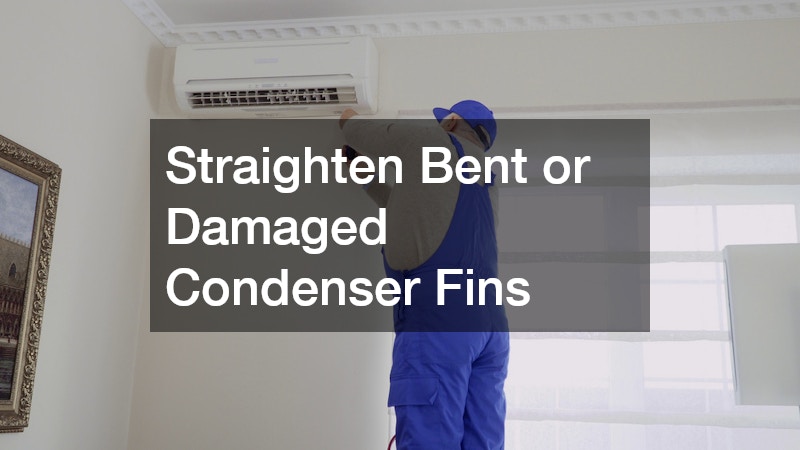
4. Straighten Bent or Damaged Condenser Fins
The exterior of your outdoor unit is wrapped in hundreds of ultra-thin aluminum fins designed to maximize the surface area available for heat dissipation. Because these fins are incredibly delicate, they are highly susceptible to damage from intense hail storms, rogue lawnmowers, heavy yard toys, or even careless pressure washing. When these fins become flattened or bent out of shape, they block the critical pathways that allow air to flow across the internal copper coils, trapping heat inside the system and preventing effective indoor cooling.
Fixing minor fin damage is a meticulous but highly rewarding task that can be accomplished using a specialized, inexpensive tool known as a fin comb. Carefully match the teeth spacing of the fin comb to the density of your condenser fins, then gently pull the tool vertically across the crushed areas to straighten them back into their original parallel alignment.
Work slowly and methodically, as rushing this process can accidentally tear the fragile aluminum or puncture the underlying refrigerant lines. If a massive section of your condenser exterior has been severely crushed or pancaked by a major weather event, it is wise to bring in a professional HVAC company to evaluate the structural integrity of the coils. A qualified professional can determine if the airflow restriction has caused secondary strain on the compressor, providing reliable AC repair to prevent a total system breakdown during the hottest months of the year.
5. Check Your Main Circuit Breaker Panel for Tripped Switches
A central air conditioning system splits its heavy electrical workload between two primary components: the indoor air handler and the outdoor condenser unit. Because these components pull significant electrical currents, they are wired to separate breakers inside your main electrical panel to prevent overloading your home’s electrical grid. If a power surge occurs or if the outdoor compressor experiences a momentary spike in resistance, the outdoor breaker may trip while the indoor blower motor continues to run without interruption.
When this specific electrical split happens, your indoor vents will continue to aggressively push air throughout your home, but because the outdoor compressor is completely devoid of electrical power, no heat is being removed from that air. Walk out to your home’s main electrical panel, open the metal door, and search for the circuit breakers labeled “AC,” “Air Conditioner,” or “Condenser.” Look closely for a switch that has shifted into the middle position or displays a small red indicator window, signaling that it has tripped under load.
To properly reset the circuit, firmly push the tripped switch entirely to the “Off” position until you hear a distinct click, and then flip it back to the “On” position. Return indoors and wait a few minutes for the system’s built-in time delay to expire, then listen for the characteristic hum of the outdoor unit kicking back to life. If the breaker immediately trips a second time upon activation, do not attempt to reset it again, as this indicates a serious electrical short circuit or a failing compressor component. In this situation, immediately contact experienced heating and air conditioning contractors to diagnose the underlying electrical faults before attempting to run the system again.
6. Examine the Evaporator Coil for Ice Accumulation
It may seem entirely counterintuitive that an air conditioner failing to cool your home could actually be frozen solid inside, but ice accumulation on the indoor evaporator coil is an incredibly common phenomenon. When airflow is heavily restricted by a clogged filter or closed vents, or when the system is low on refrigerant, the temperature of the metal coil drops well below freezing. The natural moisture and humidity pulled from your indoor air then condense onto the freezing coil and instantly turn to ice, creating a thick thermal barrier that blocks all further heat transfer.
If you notice a sudden drop in airflow accompanied by a mysterious puddle of water forming around the base of your indoor furnace or air handler closet, your system is likely iced over. Turn your thermostat setting completely from “Cool” to “Off” immediately, and switch the fan setting to “On” to force warm room air across the frozen coil, allowing it to melt naturally over several hours.
- Do not chip at the ice: Never use knives, screwdrivers, or sharp tools to scrape ice off the coils, as you can easily puncture the copper lines.
- Check for airflow blockages: Ensure all supply registers and return air grates throughout your home are fully open and unobstructed by furniture or curtains.
- Monitor the condensate drain: Keep an eye on your floor drain or condensate pump to ensure the melting ice doesn’t cause an accidental household flood.
Once the ice has completely melted away and you have installed a fresh air filter, you can attempt to restart the cooling cycle to see if normal performance returns. If the ice begins to reform on the copper lines within an hour of operation, you are likely dealing with an internal system issue that requires the attention of a certified professional offering specialized air conditioning repair.

7. Search for Physical Holes and Disconnections in Your Ductwork
Your home’s network of air ducts serves as the highway system that delivers conditioned air to your rooms and returns warm air back to the cooling equipment. Over time, shifting structural foundations, deteriorating duct tape, or attic pests can cause sections of flexible or sheet metal ductwork to pull apart, crack, or tear open completely. When ductwork breaches occur in unconditioned spaces like hot attics, crawlspaces, or unfinished basements, the consequences to your indoor comfort can be catastrophic.
A significant tear in a supply duct means that the crisp, cold air your system worked hard to generate is being dumped directly into your empty attic rather than reaching your living room. Conversely, a disconnected return duct will draw superheated, dusty air from the attic straight into your cooling system, completely overwhelming the evaporator coil and causing lukewarm air to exhaust from your vents.
If you have safe access to your attic or crawlspace, perform a visual inspection of the exposed duct runs while the system is running, feeling along the joints for rushing air or looking for obvious disconnected segments. Minor air leaks at accessible joints can be temporarily sealed using specialized mastic duct sealant or heavy-duty aluminum foil tape, though standard cloth duct tape should be avoided as it breaks down rapidly under heat. For extensive ductwork collapses, routing issues, or hard-to-reach, uninsulated runs, consulting professional AC installation companies is the most effective path forward to design and install an airtight ventilation system.
8. Inspect the Condensate Drain Line for Blockages
As your air conditioner cools your home, it simultaneously acts as a powerful dehumidifier, extracting gallons of water vapor from the humid indoor air every single day. This extracted moisture accumulates in a drip pan directly beneath the indoor evaporator coil and funnels safely out of your home through a PVC condensate drain line. Because this drain line remains constantly wet, dark, and warm, it becomes a prime breeding ground for algae, slime, and mold spores that can eventually form a thick, gelatinous clog.
Most modern cooling systems are equipped with an inline safety float switch designed to detect when water is backing up in the drain pan. When the water rises to a dangerous level that threatens to flood your ceilings or floors, the float switch triggers an emergency shutdown sequence, killing power to the outdoor condenser while letting the indoor fan run safely.
To clear a suspected condensate blockage, locate the outdoor termination point of the PVC drain line, which usually exits the foundation wall near the outdoor condenser unit. Attach the nozzle of a wet/dry shop vacuum to the end of the PVC pipe using a towel to create a tight seal, and run the vacuum for a few minutes to forcefully pull the accumulated sludge, algae, and stagnant water out of the line. Afterward, pour a cup of distilled white vinegar down the indoor access T-pipe to kill any remaining biological growth, allowing the safety switch to drop back down and restore full cooling operations to your system.
9. Evaluate Your System for Refrigerant Leaks
Refrigerant is the lifeblood of your air conditioner, operating as the chemical heat-transfer medium that continuously absorbs warmth from inside your home and rejects it outdoors. A common misconception among homeowners is that air conditioners actively consume refrigerant over time, similar to gasoline in a car; in reality, an AC operates on a completely sealed closed-loop system. If your system is low on refrigerant, it means a physical hole or fracture has developed somewhere along the copper lines, allowing the vital chemical gas to slowly hiss out into the atmosphere.
When refrigerant levels drop below design specifications, the system loses its thermal capacity to absorb significant amounts of heat from your indoor environment. You will notice that the air coming from your vents feels lukewarm, the indoor humidity levels remain oppressively high, and the system runs continuously for 24 hours a day without ever reaching your thermostat setpoint.
Furthermore, low refrigerant levels often manifest as a distinct bubbling or hissing sound coming from the indoor air handler or the outdoor lineset, accompanied by persistent ice formation along the copper pipes. Because refrigerant handling is strictly regulated by federal environmental agencies due to environmental hazards, homeowners cannot legally or safely purchase or add refrigerant to their own systems. If you observe these symptoms, you must turn off your equipment to protect the compressor from fatal friction damage and immediately contact a licensed professional for expert air conditioning replacement or leak repair.

10. Consider the Total Lifespan and Degradation of Your System
Like all mechanical appliances, air conditioning systems have a definitive operational lifespan that is dictated by build quality, regional climate demands, and historical maintenance consistency. On average, a well-maintained central air conditioning unit can be expected to provide reliable, efficient cooling for roughly 10 to 15 years. As a system enters the final years of its life cycle, internal components like the compressor valves, fan motors, and heat exchangers naturally degrade, resulting in a steep decline in overall operational capacity.
An aging, deteriorating system will struggle to keep pace with intense summer heat waves, consuming massive amounts of electricity while failing to drop indoor temperatures into a comfortable zone. If you find yourself frequently calling out repair technicians, dealing with escalating utility bills, and constantly patching up an old R-22 refrigerant system, you are likely pouring money into a failing asset.
Investing in a modern, high-efficiency cooling system can completely transform your home comfort while slashing monthly energy consumption by up to 30% or more. When navigating the complex process of selecting, sizing, and installing a new cooling system, scheduling comprehensive consultations with premier AC installation companies will ensure you receive a system tailored to your home’s unique layout. Taking the time to collect detailed quotes and system proposals from multiple reputable service providers will allow you to make an informed, confident investment in your home’s long-term infrastructure.
Experiencing an air conditioner that runs continuously without lowering your indoor temperature is a frustrating challenge, but it does not always mean you are facing a catastrophic financial expense. By methodically working your way through this checklist—starting with simple airflow verifications like checking your air filter and clearing away yard debris—you can rule out basic issues before seeking professional assistance. Taking a proactive approach to your home’s cooling infrastructure empowers you to communicate effectively with technicians and maintain tight control over your indoor environment.
When basic troubleshooting steps fail to bring back that welcome blast of cold air, remember that your cooling system is a highly complex network of electrical circuits, pressurized chemicals, and delicate mechanical parts. Attempting to force a malfunctioning system to run can cause minor, inexpensive issues to cascade into major compressor failures. Do not hesitate to call upon certified professionals to perform accurate diagnostics, restore safe operational parameters, and ensure your household remains safe, cool, and comfortable all summer long.